Wanna be the best Australian skateboard photographer?
Skateboard photography has to be the coolest style, and one of the only areas of photography which can capture real culture and action.
To master the art of being a skateboard photographer you need to combine techniques of sports photography with the grittiness of urban street photography, and find the best angles to boot.
In this guide to become a skateboard photographer I’ll cover some of my best tips, and even if you’re somewhat of a pro I hope some of my experiences help you.
Hopefully I’ll give you enough basics so you can go out and take excellent skateboard shots!
What’s the best camera for skateboard photography?
You probably have a camera already, and these days an iPhone is pretty capable (although can be a little slow for action shots). You can do better though.
Any Canon or Nikon will be totally capable, even the older ones. Buying a new one for $$$$s won’t make you a better photographer, and any DSLR from the last 5 years should give you all you need in terms of functionality or resolution good enough to print huge 1.5m canvases.
There’s also a range of very capable alternatives to Canon and Nikon, many of which have their own style and filters which actually give you an edge over the big brands.
Fuji is a great example. Even the original XT-1.
Olympus OMDs are another good choice.
Top tips for nailing skateboard photography
Let’s get into some tips. Not all will work for you, and it’s not an all or nothing thing, so don’t worry too much.
Over time you’ll figure out what works for you, so the best thing you can do is start at the skate park and practice.
1. Camera settings
The first thing in skateboard photography is setting the camera with the right settings. If you don’t set your camera correctly, you cannot get quality pictures no matter what.
Knowing what shutter speed you need is crucial for getting the pictures you want. Start with a fast shutter to crisply capture the action, but you’ll probably find in time a bit of motion blur can work to your advantage.
1/1000th of a second on shutter priority (i.e. the camera will figure out aperture and ISO for you) will allow you to capture most shots flawlessly in daylight.
1/60th of a second, panning to track the skateboarder, can give you an excellent blurred background if you nail it. This is a great trick well worth mastering, as having a crisp skateboarder and blurred background really accentuates the movement.
Also consider how fast the skateboarder is moving. 1/1000th of a second will capture fast moving action, but for slower trick shots you can probably drop to 1/250th or 1/500th – this will allow a lower ISO and less noise/grain.
Use continuous shutter, bursts, or learn to hit the shutter a few times for each shot – then figure out later which is the best of the set.
2. Get the right angle
As a general rule, getting low down and photographing the skateboarder from below will give you the best angle. This gives the impression of more air, and more height.
Here’s the perfect example of using this angle in skateboarder photography:
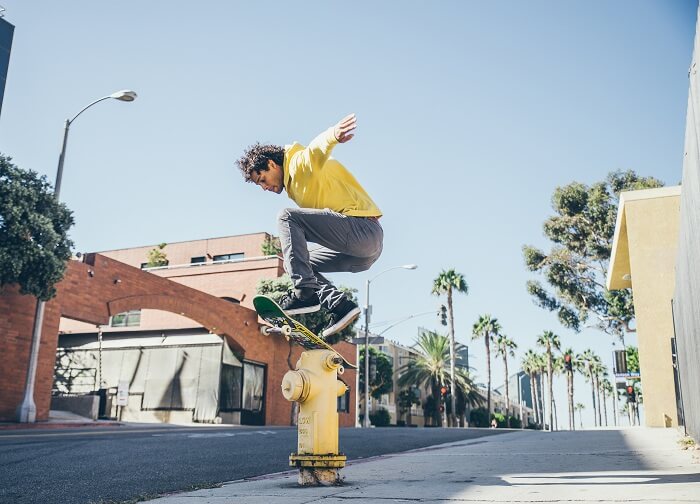
Give it a go with the skateboarder doing an ollie. Take one shot from above, one from below (even from ground level). You’ll see what I mean – the shot taken from above will look lame.
Some nice results can be achieved by having something in the foreground, such as blades of grass or some urban object like a kerb or bollard, even the legs/board of another skateboarder. Adding stuff to the frame gives a better sense of dimension and realism. Experiment!
3. Understand skateboarders and work with them
You’re probably a skateboarder yourself, but even if you’re not it doesn’t matter. For skateboard photography you simply need to understand how it’s done – different tricks, where the action is, and how individual skateboarders differ.
Ideally work with a group of skateboarders, or get to know the regulars as a skate park. Getting to know them will go a long way, and what skateboarder doesn’t want to be photographed taking awesome tricks?
Take your time to understand skateboarding, knowing what tricks work best with your style of photography. The better you know skaters’ personalities and their skating techniques, the more likely you’ll capture great photos.
4. Get a nice background, without distractions
What really bugs me about skateboarding photographs is when the background is full of distractions – other people, too many buildings, or other “noise”. Some of these can be cropped out in edit (and should be cropped out as much as you can), but if you don’t consider background when you’re taking shots you’ll go home with a load of unworkable photos.
A good background should provide a perfect contrast with the skateboarder and their surroundings.
The choice of the background must also be authentic and natural. If you are taking a photograph from above, you can’t have the sky as the background, but you can definitely use the skate bowl.
If there are other skaters in the background, make sure they’re not directly behind your subject. For example, using the rule of thirds method (Google it if you don’t know this basic technique), then have your skateboarder on one third line, and a crowd of people on the other third line, preferably slightly blurred and not distracting in any way.
Shooting from the ground can also help give you a simpler composition. Most of the foreground, such as the concrete in front of the skater, can be minimal and out of focus. I said about the importance of shutter speed earlier, but once you gain experience you’ll start using aperture more to blur the foreground and background.
One other little tip I’ll throw in here is use leading lines. It’s another basic photography technique which works great for skateboard photography. Now for an example – imagine your skateboarder is doing an ollie off a kerb. Get the camera right down kerbside, and take the photo pointing along the edge of a kerb directly towards where your subject will jump. It’s a great angle.
5. Capture details and tell a story
Anyone can take a photograph of a skateboarder, but making it interesting is much harder. Any photo should tell a story, even if that story tells how cool a deck is, or how cool the wheels are in motion.
I said about getting to know the skateboarders you work with. What’s their style? Their fashion? Capturing their style also captures their culture, and stuff like this sets apart a lousy photograph from a great one.
Try an capture the essence of a trick. Even ollies can look amazing with the right angle, right background, and elements of the skaters personality or style.
Sometimes a close up works great, using a zoom lens, or other times get your whole subject in the frame – pay attention to their body movements, how their limbs work, head, board, action.
The best skateboard photography is the stuff that tells a story.
Mostly I use colour. More so in 2022 because most people for the last 5 years seem to think black and white is cooler. Truth is colour is better, but also harder. I confess some photos I take I convert to black and white in edit, simply because it makes them “work” when colour just doesn’t.
The following is a photo I took at Scarborough skatepark in Western Australia. It’s not the best action shot, but it’s a great example of telling a story:
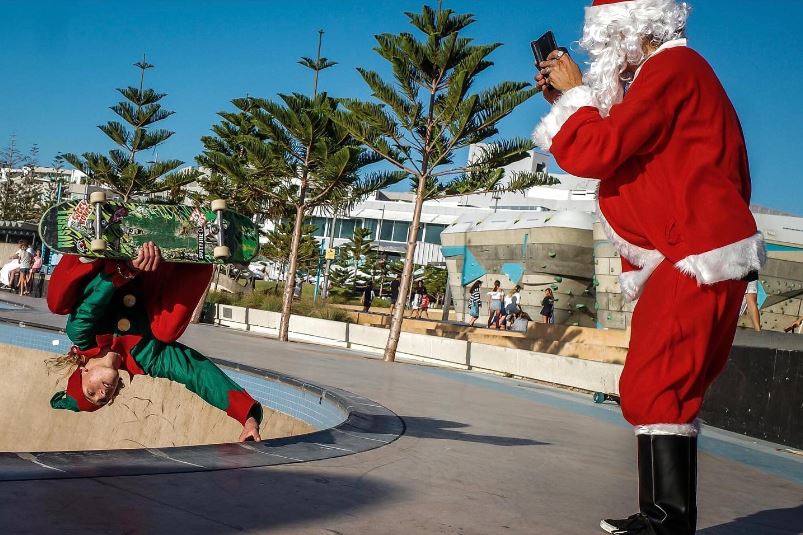
Don’t be afraid of cropping in edit. There’s nothing worse than something distracting in the composition which takes the eye away from the story.
Most cameras these days have a crazy resolution, so even cropping to a small area of the photo can still be good enough to print on A4 or larger. I’m a street photographer, and I swear most Leica photographers just point and shoot a scene, then go home and crop out interesting parts of it which they hadn’t actually noticed when taking the shot!
For skateboard photography, nailing a whole subject trick shot can give you the main story, then create a series of more detailed crops which tell the stories within a story. For example, a shoe moving along the board with undone laces, or some element of the skaters clothing, hair movement, or expression.
6. Know your location
Did you know most photographers pick a spot and just rotate zooming in and out taking photos.
If you do this, you’ll be a sucky photographer.
I started photography with a Canon and zoom lens, but only when I switched to a fixed lens for a while (Fuji X100) did I really learn about composition. I would go out with photography groups, and as they stood in one spot I had to move around and try different spots, different angles, different compositions.
Only then did I start finding what worked and what didn’t.
Anyone who’s played Call of Duty online will know the benefits of camping in one spot and really getting to know it – it leads to more kills, right?
It’s the same for skateboard photography. Start with your local skate park – get to know it inside and out. Move around, scope it out, try different angles. Get near the action, or move back and shoot through a bush.
If you’re like me, you’ll need to go home and check out the photos you took before really realising which ones work and which didn’t.
Then go back and take another set.
What about light? To really master skateboard photography you need to understand the importance of light in an environment, and how it changes through the day. This is one of the most important factors with street photography as well.
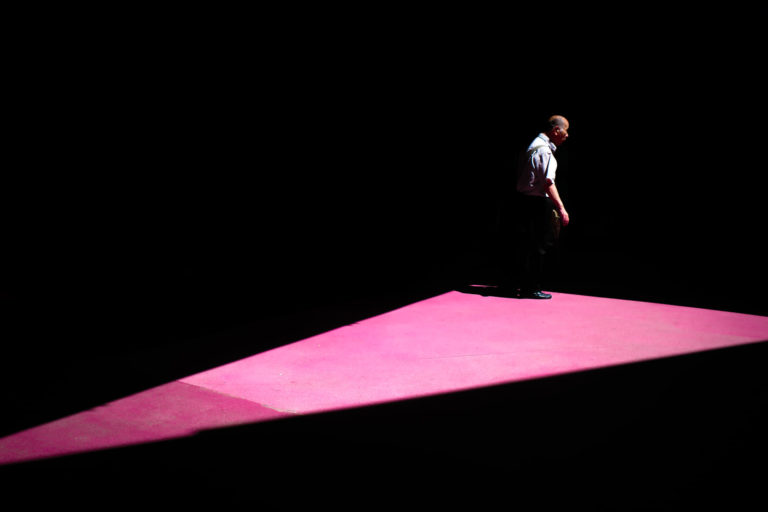
Check out the following photo by professional photographer Andrejs Pidjass. Pay attention to the angle, composition, positioning, and lighting. Notice the light in the background, and how this plays a part in lighting the scene. Also notice how little light there is on the skateboarder, he’s mostly backlit with a contrast of more light on the environment:
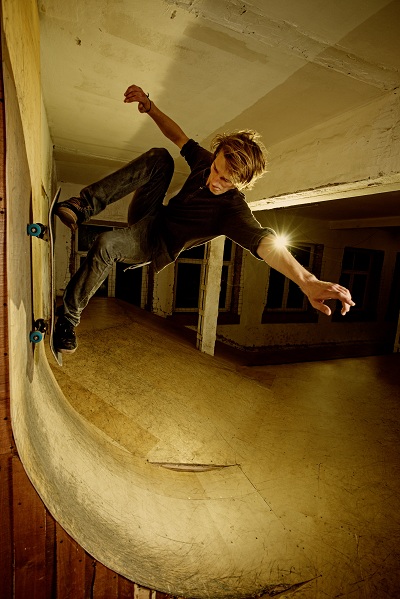
Long shadows in the morning or evening can make or break a shot. You might find one of the best compositions is in full sun most of the day, but have perfect light and shadow in the evening.
The only way you can master this stuff is to really know your location and environment.
It’s the same anywhere, from the skate park to a grungy alleyway. There will be perfect times of the day for certain shots.
What works better, the sun behind you pointing down a half pipe, or the sun setting beyond it?
You’ll find captivating, interesting things in any environment, then all you need to do is have a skater casually go past. Sometimes they don’t even need to do a trick.
7. Be innovative and break rules
The only way you’ll become the best skateboarder photographer is from taking hundreds of rubbish photos. But it doesn’t matter if what you’re doing is trying different things.
Be creative and think outside the box. I bet you don’t have a film camera, so always keep in mind digital photographs are free. Just delete any rubbish in edit to save filling your computer.
Walk around the scene without your camera, using your fingers to mimic the lens. Better yet, get someone else to do the finger thing, and take a shot using their fingers as a frame. I don’t even know whether this would work, but it’s an example of thinking outside the box and trying different things.
Lie on the floor and have a skateboarder come directly at you. Obviously keep health and safety in mind, and play chicken with careful consideration, but how cool would a photo be of a skateboarder skidding away within inches of your lens?
You have imagination. Use it!
8. Use external flashes (or don’t use flash)
Ok, ok, I was searching Google for what other people have suggested for skateboarder photography, and one was to use external flashes.
I never use flash, but sometimes for pro shots or magazine shots you’ll need a flash to get a studio feel.
If flash photography is your thing, then this is a skill well worth mastering. It’s not as easy as it sounds, as you need the flash to work well with other ambient or diffused lighting in the environment, and you’ll need to get it to work in harmony with your camera settings.
If you don’t use flash, then you’ll be using the natural light in your environment – either way, lighting is crucial.
Always know where the sun is. Getting a subject half in sun and half in shadow can work really well (i.e. the sun comes in from the side). Pay attention to shadows as well.
Light is so important in all styles of photography, and one of my best tips is so pay attention to filmography. Have you seen the movie Sicario? Or Blade Runner? These are perfect examples of using light – most scenes are actually backlit, or with the light silhouetting the subject – but natural light and the environment is almost always used in a way best for the scene.
Always pay attention to how light is used in movies and decent TV productions, and while you’re at it also pay attention to camera angles, foreground, and backgrounds. Those guys are pros, and you can learn from them simply by paying attention watching great movies.
9. Use a wide angle or fish-eye lens
You can get really great skateboarder photography using different lenses.
Wide angle lenses allow you to capture most of a scene and work best if you can get up close to the skateboarder or action.
Fish-eye lenses can make any scene look cool, and allow you to get really close to a skateboarder doing a trick while capturing their whole body and board.
Most modern cameras have fun modes as well, such as an emphasis on a specific colour, or toy mode, sepia, or other quirky stuff. Modern phones have filters which can create some cool effects.
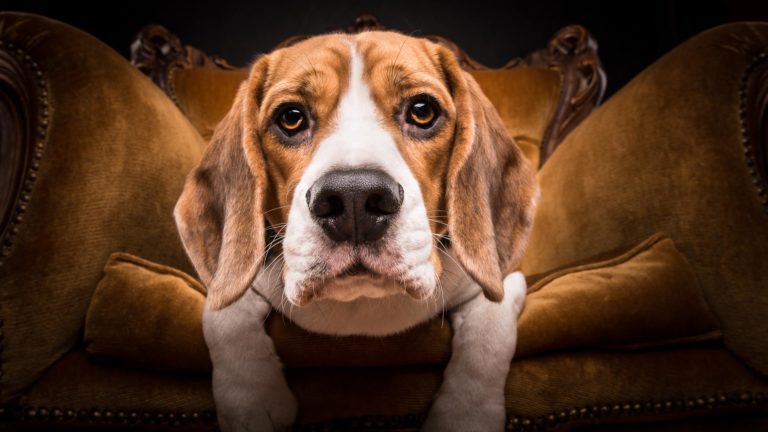
I came runner up in a photography competition recently in a category for “Animals and pets”. I entered an amazing photograph of my dog, using professional techniques and a really cool environment – great lighting, Chesterfield sofa, perfect focus and details on the eyes.
The winning photo used an iPhone filter, simply being the head of the photographer’s black Labrador, and everything else was black. Fair enough, it was a cool image, but it took no skill whatsoever. Truth is it doesn’t matter – use whatever works!
Using a fish-eye lens for skateboarder photography is no different. If it produces cool results, and if it’s something you enjoy mucking around with, then go for it!
10. Get your photos out there
If you’ve got this far, then I’m guessing you’re all geared up to be Australia’s next leading skateboarder photographer!
Hopefully with the skateboard photography tips above you’re already well on your way to some awesome shots, but getting them out there and noticed is a bigger job in itself.
Check out Instagram accounts with thousands of followers. It doesn’t matter whether the photographs are good or not. Actually most of the best photographers have few followers, they’re just rubbish at marketing them.
Always looks for opportunities to share your work. Social media is powerful when you know how to use it, and as a photographer YouTube can really build you an audience – perhaps do some videos when you’re at the skate park taking cool shots. Then link the YouTube video to your Insta profile.
In Australia there’s so many hipster cafes, and approaching them to see if you can put some of your best prints on the wall can be a good idea. I’m in Scarborough Western Australia, and near the skate park there’s actually a skate cafe called Livid, and that’s a perfect example of someone who can tout your work.
Featured image courtesy of mr.28mm.

